Problem
One of the key problem that developer face when building a website is configuring the extra security layer by adding SSL. In the past, we should buy on the third party like GoDaddy or other. Today, Azure can do it right away without leaving the portal by following this article. However, the article doesn't describe how to configure with a different tenant. On this situation, I have an SSL certificate from Azure Subscription X with account A, and want to use for Azure Subscription Y with Account B. this article will describe it for you:
Step 1. Order Your Certificate
This step is done on your subscription, where you want to buy your certificate
- Place certificate order here https://portal.azure.com/#create/Microsoft.SSL
- Your certificate should be stored in Key Vault so you need to store one
- After that you should validate the domain, I recommend you to use email approach, it is the simplest way to validate, except you don't own your domain.
- You will get your certificate not more than 15 minutes
- After the validation and creation process, you can use the certificate by following this article
The problem is you can't directly import the SSL on different Azure subscription with the different Azure account. So in order to do that, you can do step 2.
Step 2. Export Your Certificate Using PowerShell
On this step, you need a PowerShell. It is default installed within new Windows such as 10 or 2012 R2 later. You will do this step on your subscription that has a certificate issued.
-
On your Azure Portal, write down these four items: (1) your app certificate name, (2) your resource group name, (3) your azure email account, and (4) your subscription id. You can obtain it easily by visiting app service certificate and click overview.
232w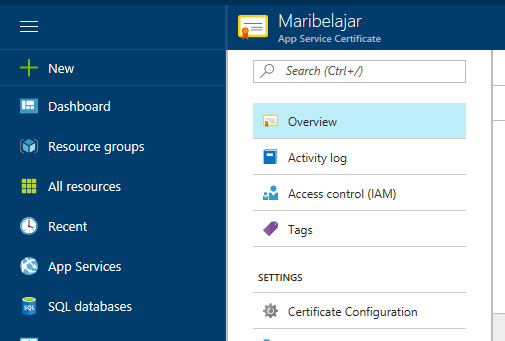
- IMPORTANT Download the template here
-
Use the information before to fill the PowerShell variable as shown below
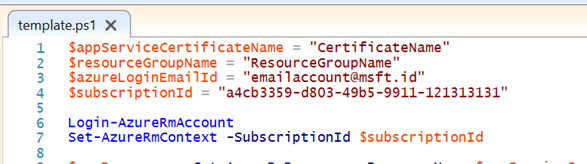
- After changes the template, open your PowerShell. Please don't open directly using left click but use PowerShell instead and then navigate using the PowerShell. This will make sure the PowerShell Windows still open because you need to write down the one-time generated password. This password is used to import the certificate. You will get two things on this step the certificate with the .pfx file and the password on the PowerShell screen. We will use that in the last step.
Step 3. Import the certificate
This step is done on Subscription that uses the certificate. On our case is subscription Y and account B. the step is simple