Today, I will show you how to create and manage requirements by using Azure Boards. Azure boards is the project management features for DevOps. You can manage your software requirements with the Azure Boards. Before start, you should:
The service is free, just create an account and you will be good to go:
Beginner Guide Scenario
On this guide, I will adopt Scrum method, create features, user story, and tasks. On this demonstration, I will create a mobile software that help woman to choose the cosmetics based on the face recognition features. The beginner guide will be described as step by step scenario
Step by step scenario
- Creating DevOps project with Scrum method
- Composing team member
- Planning iterations
- Creating user stories
- Allocating user story to the iteration
- Monitoring tasks progress and user stories.
On the huge project, you will need to create features. Features are group of a related user stories.
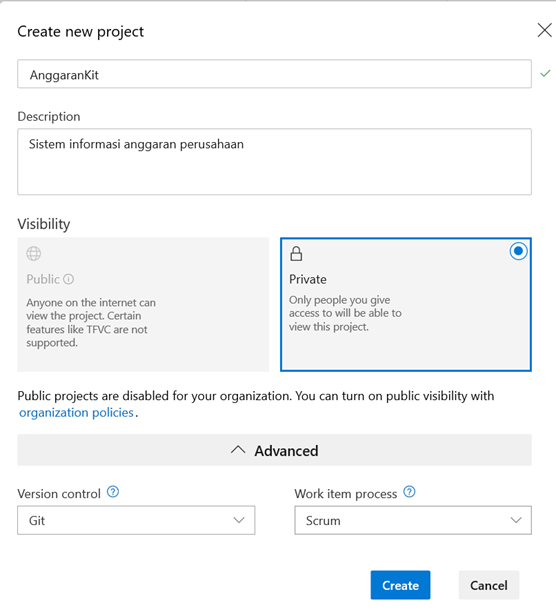
#1 Creating New Project
Create a new project. For example, I create a website namely AnggaranKita with Scrum method
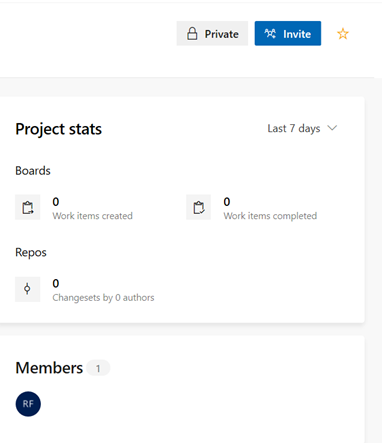
#2 Composing Team members
Click invite button, to invite the members. The member should in the organization or have Microsoft account. If they don't have the account, they will be invited and create they own account
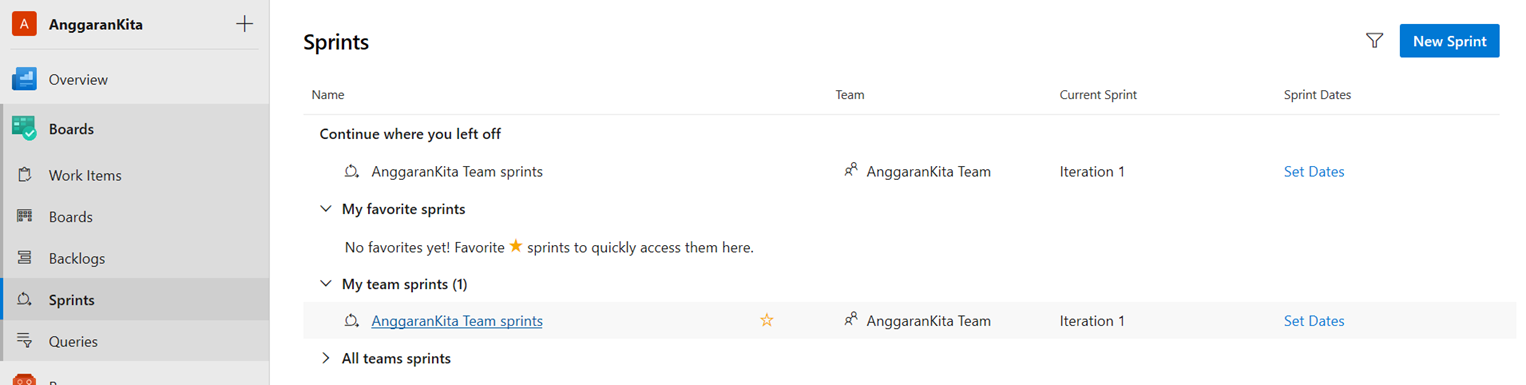
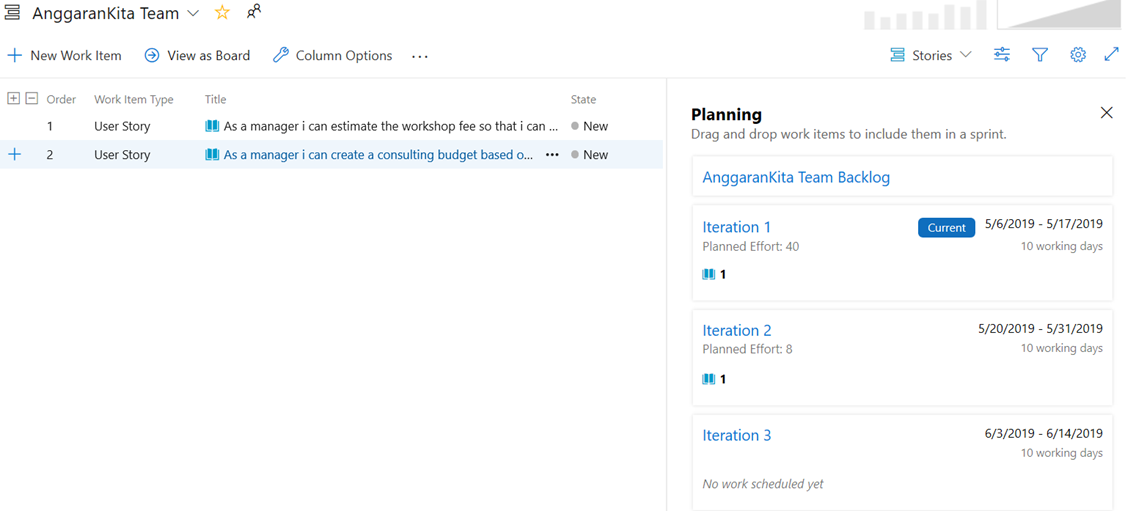
#3 Planning Iteration
Click the Boards menu, click Sprints. By default, the My Team Sprint is already created. You can click AnggaranKita Team Sprints as shown in the picture. On the sprint, you can click set dates on each iteration. On this case, we will have three iterations. Each iteration will have two weeks. We will have six weeks on total. Automatically, the Azure DevOps will remember your two weeks iteration after you defined the first iteration.

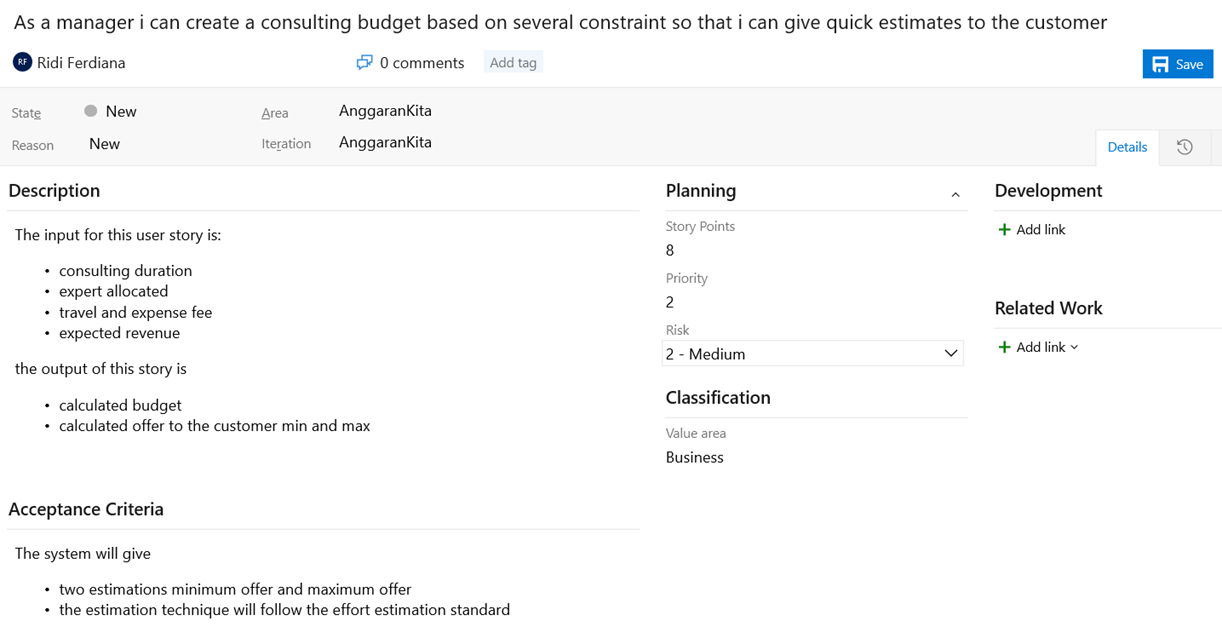
#4 Inserting Work item
In the Azure Boards, click the Work Item. Complete the user story by fulfilling
- User story title
- Description of the user story
- Acceptance criteria
- Assigned people
- Priority
- Story Points
You can see the example on this screenshot
#4 Planning the User Story to the iteration
You can put the user story to the iteration by doing drag and drop, you can do that in Backlogs section
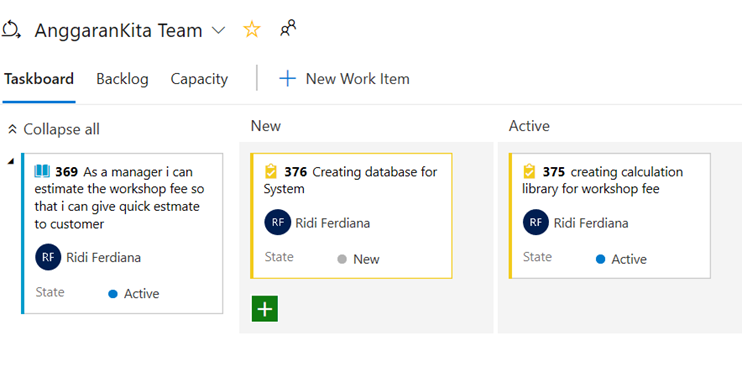
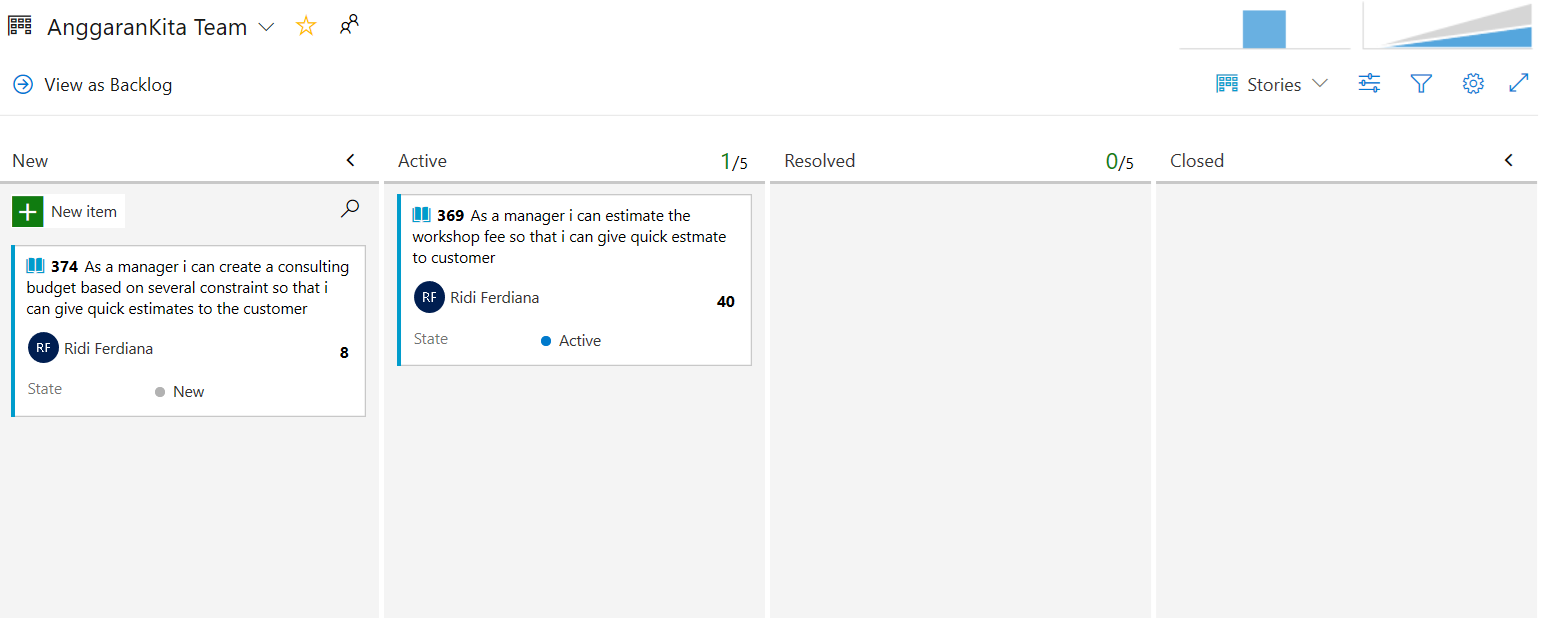
#5 Starting the Sprint
Lastly, we can manage the progress by visiting the Boards section. There are three states Active, resolved (evaluate / test), and Closed (finished). When you change the user story task to the active state. The sprint is starting
#6 Adding task on the Sprint
In the Sprint section, you can add the task or bug. This activity can only be done after you put the user story in the active state. You can see the chart in the next section.