Many of the readers, ask me how to create 'the right' product backlog in Azure DevOps. How to make sure that the requirement is correct and sufficient for developing a software. If you already read the previous article here. You will find the basic information about the fields in Azure Boards. If you go further to complete the requirements, you should combine the azure boards fields with the Scrum concept. We will discuss five steps that you need to do to make sure your product backlog Is completed and unambiguity. Let's get started
Step 1. Creating features that have values
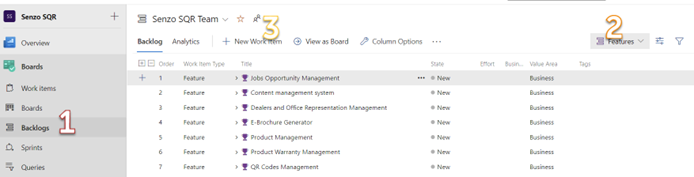
Visit your backlog and make sure you choose Features point of view. Simply stated features are any values that you promised to the customer. You can do that by
- Choose the backlogs
- Choose the features
- Click new work item
Good features example
QR Code Management, E-Brochure Generator, Student Certificate Management
Keep it short and simple an nouns
Step 2. Creating short and understandable Product backlog title
When it comes to the product backlog you should make sure that you product backlog is aligned with the features. You can do that by clicking on the + sign in the left of your feature so that it aligned
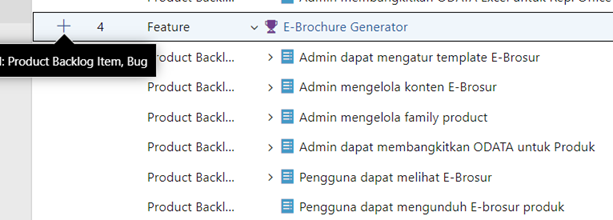
After making sure that the product backlog is contributing to your features. Next, you can give your product backlog name. My recommendation is following the format of use case sentences
Subject + action + object
For example, admin manages the family product, user views the e-brochure, or guest register their account.
Step 3. Creating user story in the Description
If you click the product backlog, you will have user story descriptions. The user story descriptions should consist of two main information:
Step 4. Acceptance Criteria is a must
Acceptance criteria helps the developer to make sure that the product backlog is tested and fulfill the business rules. You can write your acceptance criteria with one of these rules. \
Step 5. Writing the Detail
This step is optional, but my recommendation is to complete it to make sure the visibility and feasibility of the project
- Add discussion in azure board every time the requirement changes OR more information needed
- Put the status and estimate the user story. You can read the detail here Estimating Product Backlog in Azure DevOps (ridilabs.net)
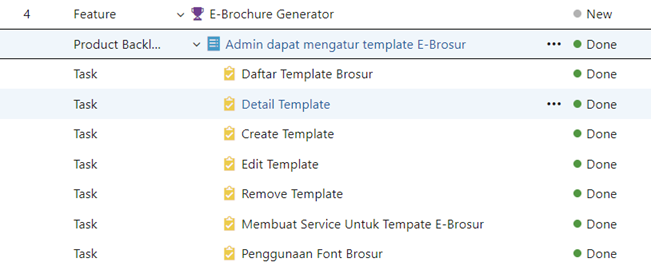
- Ask the development team to create tasks for the product backlog. Task Is the technical activity that Is ordered and belong to the product backlog
That's it, thank you! And please put your idea into comments