Background
This article will cover how to prepare a project with Visual Studio Online and Agile method. This article assumes that you already have Visual Studio Online account. If you don’t have one, just create at http://visualstudio.com.
Creating a project and version control
- On your visual studio online account, create a new project
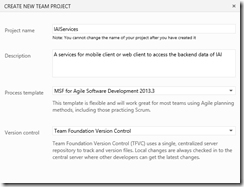
- You can full a project information like the picture below

- After waiting for several seconds, you can navigate to the project.
Adding a member
- After creating a project, you can add a member by clicking manage link on your project dashboard

- You can add your team member by typing his name or his Microsoft account email.
- Please note, that your team member should be registered on visual studio online to join the project.
Planning the iterations
- On a real project, the customer and the team meet each other on a session called a planning game. The planning game will discuss the user story, the itreration length, and the release plan of the system. On this step, we assume that you already have the user story and the release plan of the project.
- You manage the iteration length by clicking the gear icon on the right uppoer of your visual studio

- Select the iterations tab. For this example we create one release with two iteration.

- As you see we also set the date for the release plan date and the iteration. You can see on the picture, we put an overhead time to make sure the quality of our source is sufficient. Please make sure to check the checkbox to activate the iteration backlog
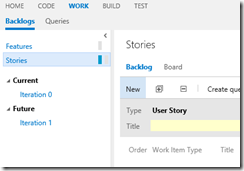
- Open back your project, and visit Work tab, you will see that we are ready to add some user story on the Visual Studio Online.

Conslusion and Future works
On this post we create a project with Visual Studio Online as a fisrt step on Application Lifecycle Management. On the next post we will discuss how to create a feature, story amd task. You can grab the visual studio on Amazon.